I love to sew, and I always want to put a personal spin on the things I make. I designed this pretty leaf patch to decorate the front of a journal cover, but it could be used on anything that's looking too plain--you could use it on the front of a purchased tote, or a bag you make yourself; on the front of a t-shirt, or on the back of a denim jacket. You could also make it in different colors for seasonal items.
Materials you will need for the patch:
--four different green cotton print fabrics, cut 1 1/4" x 12"
--blue fabric cut 3 1/2" x 5 1/2"
--green fabric cut 4" x 6"
--matching thread
--Heat n Bond Lite (You can buy this in any fabric store. You can substitute any brand of iron-on adhesive. I used the "Lite" version so I could add stitching for visual interest, but if you want a quicker project, use the "Ultrahold" version, and you can skip the top-stitching.)
Here's how the finished patch looks:
Start by cutting a leaf from paper. I made my template by sketching a leaf-shaped curve onto a 4" x 2 1/2" rectangle of paper that had been folded in half lengthwise, and cutting it out. You might have to cut out a few leaves before you get one you love!
Next, sew the four green fabric strips together lengthwise, using a 1/4" seam. Press all the seam allowances in the same direction.
To assemble the leaf, cut two strips from the sewn-together fabrics on a 45 degree angle, 2" wide, as shown in the picture below. (The easiest way to get the angle right is to use a gridded cutting mat and acrylic ruler.)
In order to get the chevron appearance, the two strips must be cut from opposite ends of your sewn-together fabric, with the 45 degree angles running in opposite directions, as in the picture below. (You will end up with an extra triangle of pieced fabric in the middle. I'm sure you can think of something cute to make with it!)
Sew the 2" strips together lengthwise, using a 1/4" seam. Press the seam to one side.
Now it's time for the HeatnBond Lite!
Trace your leaf shape onto the paper side of the HeatnBond, and cut it out, including an extra 1/4" all around. Place it on the BACK of the chevron fabric, and center it. Iron the HeatnBond in place according to the directions on the package.
With the paper backing still in place, cut out the leaf along the marked line. When you are done cutting, there will be scraps of fabric with HeatnBond on them; cut a stem freehand from these scraps.
Okay, you are halfway done!!
Measure and cut a piece of HeatnBond to go on the back of the green and blue fabric rectangles; the HeatnBond should be 1/4" smaller than the fabrics. Iron the HeatnBond to each rectangle. When the fabrics have cooled, trim them down to 3" x 5" (the blue fabric) and 3 1/2" x 5 1/2" (the green fabric)--this is the best way to be sure you have HeatnBond entirely covering the back.
I wanted some words to go with my leaf patch, so I ironed HeatnBond to the back of plain white fabric, taped the fabric to a piece of paper, and put it into my computer printer. I used two different phrases and printed them in different sizes so I could choose the best one for my finished product.
Assemble your leaf patch by first removing the paper backing from the leaf and stem. Carefully center them on the blue fabric and iron in place. Let it cool for a moment, then remove the paper from blue fabric, center it on the green fabric, and iron in place. Your patch is now complete, hooray!
The next step is to remove the paper from the green fabric and center it on the item you are decorating. Iron it in place. I put my patch on a journal cover. You can find a tutorial for it by clicking this link to my blog, Leslie's Art and Sew.
You can see that I made two leaves, and two phrase patches. I always like to have choices when I'm creating something new! I assembled the phrase patches using HeatnBond, just the same way that I made the leaf patches.
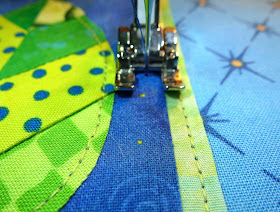
After ironing the patches in place, I sewed around the edges of all the fabrics. I used matching thread for each one. It would look good with a contrasting thread too.
Isn't it cute? I use several composition books to keep track of different things, and I LOVE this new cover! The best part of decorating your belongings with a fabric patch you make yourself is that no one else will have one just like yours!
Now, run over to Leslie's Art and Sew to see the project Mareth is sharing there today...it is surprisingly similar to mine, even though we didn't plan it that way! (Great minds think alike!)
Thanks for letting me share this project with your lovely readers, Mareth! I'm honored to be your guest!


What a great notebook! I love this pattern, thanks for sharing
ReplyDelete