Saturday, September 3, 2011

Journal Cover Tutorial

 This journal cover is a great way to make an ordinary composition book look really special and unique!  It will probably take you about an hour (maybe longer, depending on how you choose to decorate the front).


 You will need to have a standard composition book handy (measuring 9 3/4 by 7 1/2 inches).  You can get them at any store with an office supply section; for people outside the U.S. you can order them from Amazon.com (and probably lots of other places too).  Let's get started!


 1.  Cut two pieces of fabric 22 inches by 10 1/2 inches.  They can be the same or different; the lining will be rarely seen, so you can use something plain for the lining if you want to.  I'm using a black lining for clarity.


2.  Sew the two fabrics, right sides together, using a 1/4 inch seam.  Leave a 4 inch opening on one of the short sides.

3.  Turn the journal cover right-side-out.  Press.  Top-stitch the opening closed (I sewed along the entire length of the side, very close to the edge of the fabric.) 

 4.  It's time to embellish your journal cover!  This is where you can let your imagination run wild--don't feel that you have to make yours like I made mine--but I will show you how I did this one.

I had a small piece of cross-stitch that I received in the Matchbox Swap on Craftster.org earlier this year (thanks, cadet120433!).  I decided to place it on top of two other fabrics, sort of like the mat and frame of a picture.

 I used Heat n Bond to really anchor everything in place.

Heat n Bond is sticky on both sides; you iron it onto the fabric, then cut the fabric to size, then peel off the paper and iron it where you want it.

To make sure the embellishment would be centered, I measured 3 inches from the end of both long sides and placed pins there (the 3 inch section will be folded under and sewn in place to form pockets for the book covers to slide into).  Then I folded the fabric in half along the long edges to find the center, and I marked that with a pin too. 

***And now a correction***
I neglected to take into account the width of the "spine" of the composition book; when I marked the center of the fabric with a pin, I should actually have moved it 1/4 inch to the right, to allow for this.  In the finished picture at the bottom of this tutorial you will notice that my "framed" cross-stitch section is actually off-center.  Learn from my mistake!!

***Back to the tutorial***
In this picture (above) you can see that I used my clear rulers to mark off the area that will be on the front of the journal cover.  After sewing down the polka-dot ribbon, I carefully centered the "framed" cross-stitch and first ironed it in place (remember, it's got Heat n Bond on the back), then I sewed along all the edges.  (You don't have to sew when you use Heat n Bond, but I wanted the stitches to show.)

This picture shows the finished the embellishment. 

I sewed everything right through both fabrics; yes, the stitches show on the underside, but you will only see that part of the journal cover when you take it off the composition book, so it really doesn't matter.

 5.  To finish the journal cover, you need to make the pockets where the book covers will be inserted. 

You may have already done this when you embellished the front:  with the lining side up, measure 3 inches in from each end and place pins to mark the spot.  Fold the fabric over so you have a 3 inch flap.  Press.
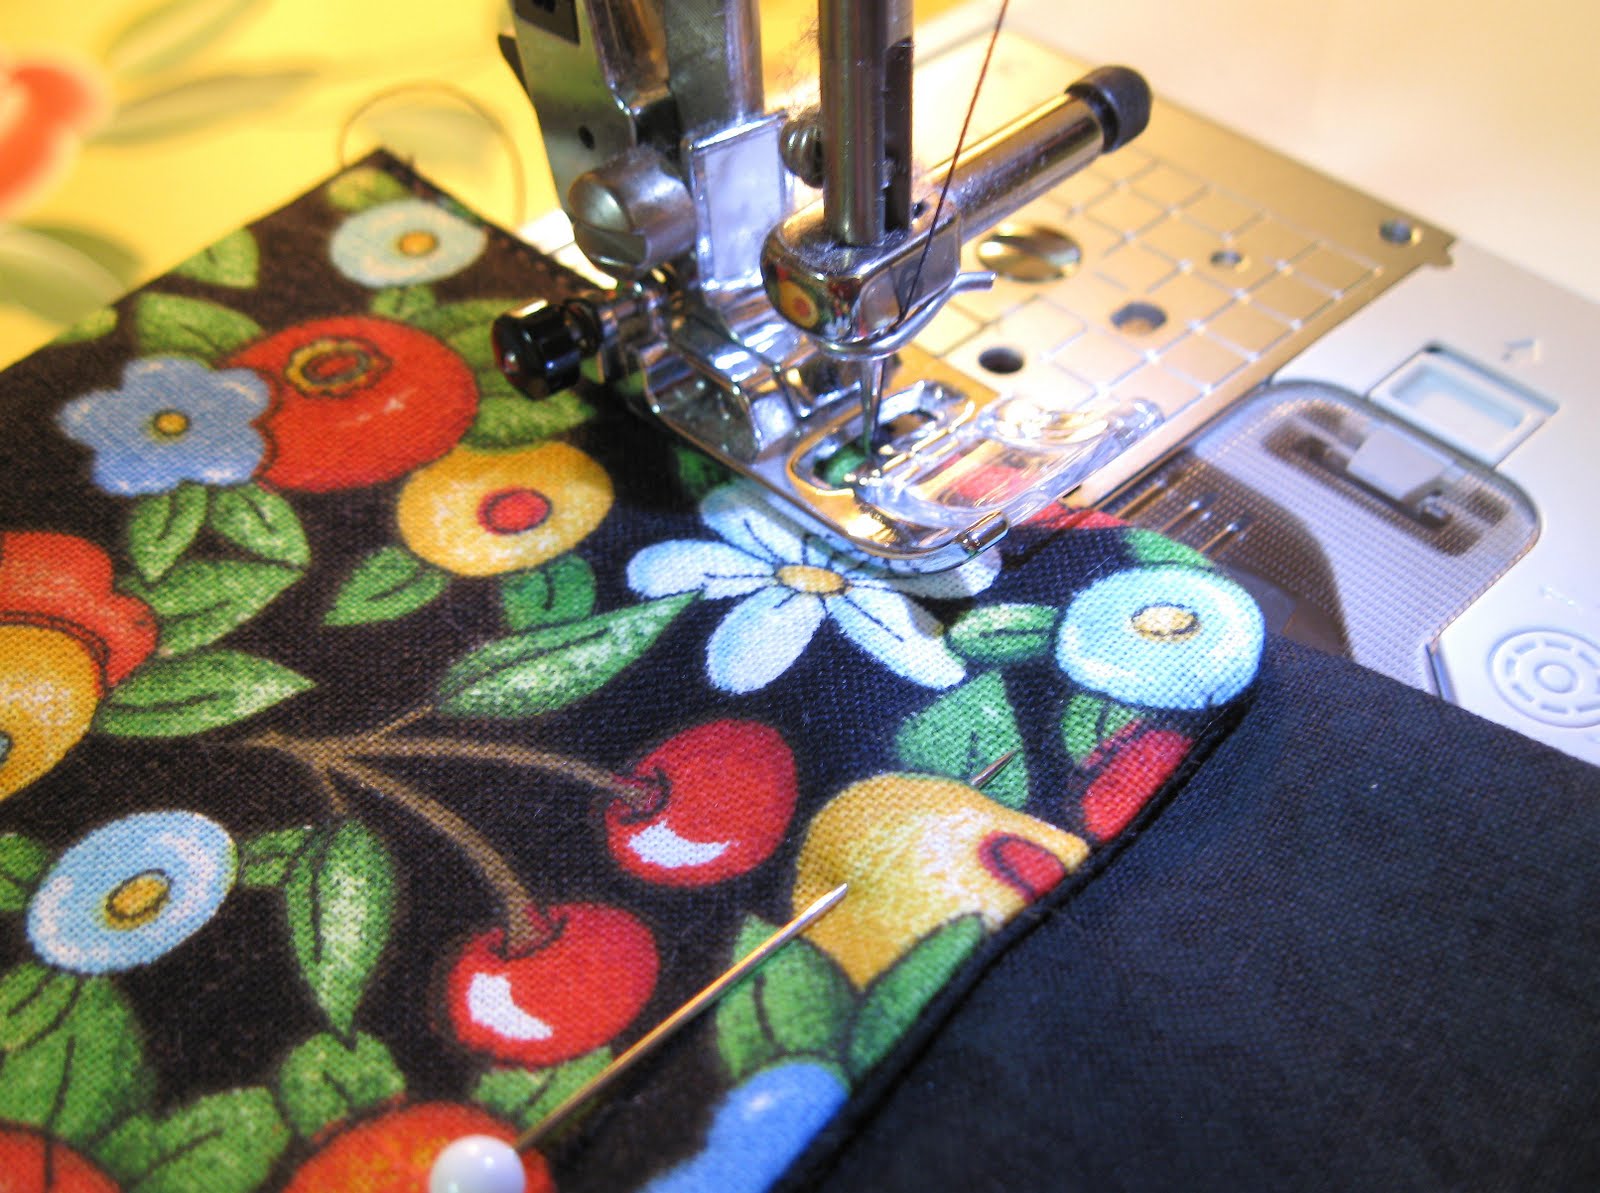
Secure the flaps in place by sewing very close to the edge (using not more than a 1/8 inch seam), on both the top and bottom.  You don't need to sew along the entire top and bottom edges; just sew to the end of the flap and backstitch a few stitches.

You are finished sewing!!  You will have to bend the compostition book covers back so they are almost touching to slip the cover on.  Cross your fingers that it fits!!  (If the fit is too loose or too snug, just take out the stitching on the back flap; re-press the flap so it is either 1/4 inch smaller (to make the cover looser) or 1/4 inch larger (to make the cover tighter) and re-sew.


Here's my finished journal cover--I love it! (Except for the slightly off-center decoration...)

Wednesday, August 31, 2011

Journal Covers

Update:  You can find the tutorial for these covers by clicking HERE .

I love to make lists and plan out my week, and I love to keep all my lists together in a nice book.  However, I have trouble writing in a nice book!  What if I mess it up?  I will have ruined a nice, expensive book!  I decided to get around this problem by turning a cheap composition book into a nice, expensive-looking book by sewing a beautiful cover for it.  I can write in the book to my heart's content, and then when it is full (or when I mess it up) I can take the cover off and put it on a fresh book.  Here are the two covers I made:


Now that my composition books look so nice, I have to give the covers a nice name too, so instead of just calling them "book covers", I have named them "journal covers."  I'm not actually "journalling" in my book, but it could be a journal. 


The basic journal cover is simple to make.  The embellishment is what takes time, but I think it is SO worth it!  There are so many different ways you could decorate the cover; you are limited only by your imagination.  I LOVE both of these covers and I'm thrilled with how they came out; in fact, I'm so thrilled that I want lots of people to share my excitement by swapping them on Craftster.org!  My friend Susan and I will be co-organizing a Journal Cover Swap starting mid-September.  I will get a tutorial posted here pretty soon, so anyone who's interested can make a practice one before the swap.  I hope you will join us!

Tuesday, August 23, 2011

Craft Gossip

Craft Gossip (http://www.craftgossip.com/) is one of my two favorite crafty websites (Craftster.org is the other!) In case you haven't heard of it, Craft Gossip is an awesome website that offers a roundup of some of the best and most interesting crafts and crafters on the internet.  You can find links to any kind of project there.  My favorite part about it is the e-mail I receive every morning, featuring their newest finds.  I ALWAYS read about something that I need to know more about--so I just click the link and I am taken to a website or blog where I can read all about it!  I get so many good ideas from that daily e-mail!


Craft Gossip recently announced that they will be hosting an event for crafty bloggers in Little Rock, Arkansas on September 10th.  It will be an afternoon of eating, talking and crafting called Fork and Talk. It is sponsored by EK Success Brands, a craft products company that includes Martha Stewart Crafts, among many others.  The guests at the event will be able to try out new craft products--I'm not sure if that is before, after, or during lunch!--while meeting some of the staff at Craft Gossip, and talking with other crafty bloggers.


Oh, I didn't mention the venue:  this will all take place in a private room at Trio's, an upscale restaurant that serves amazing food.

 Anyone with an active crafty blog, who is in Little Rock, or could be there that day, is welcome to ask for an invitation.  I live in Virginia but my mom lives in Little Rock--WOW, this is perfect for me!  So I requested an invitation, and about a week later I was invited!

So I have my plane ticket and I am so excited about my weekend in Little Rock!  I will take lots of pictures and when I get back I will blog like crazy!

Wednesday, August 17, 2011

Hungry Monster Step-By-Step Directions

So, when we tested the pattern for our Hungry Monster Swap, one of the testers had trouble with it, so I am going to take you through it step-by-step.  The REAL tutorial is here:  http://thelongthread.com/?s=monster+tooth+pillow.  I simply hope to clarify things for those in our Craftster.org swap.  Here we go!

First, go to the link above and print out the directions.  They are all on one sheet, easy!  This picture shows all my materials (except the fiberfil stuffing).


Start by pinning on the eyes.  I tried putting mine a little lower and closer together than the pattern says to; I found out I like this placement better.  Sew the felt circles on.  I should have sewn on the buttons here too, but I waited until after the sides were sewn--don't wait!!  Sew the complete eyes NOW!

On to the mouth.  This is where my tester had trouble.  I've pressed a crease into my fabric and cut the teeth (I cut mine freehand, that's why they are a little wonky.  I like that!)


Sew the teeth just like you see in this picture:  the straight, uncut edge of the felt is placed just ABOVE the pressed crease; the teeth are pointing down, and the orange fabric is flat, not folded.

To finish the mouth, just fold the orange fabric on the crease so the teeth stick up and the line of stitching is on the back.

Place the fabric with the teeth on top of the fabric with the eyes.


(Sorry this next picture is sideways--I can't figure out how to change it, so let's pretend it's right...)
Pin the mouth fabric to the eye fabric, then lay the backing fabric on them, face down.  Sew all around, leaving a 3" opening for stuffing.  (I left my opening on the top, since there are only two layers of fabric there to contend with).


Turn the monster right side out, and stuff with fiberfill.  Sew the opening closed.


Get together with your friends and PAR-TAY!!

Tuesday, August 16, 2011

What I Like About Fabric.com

I buy a LOT of fabric, and I get 75% of it on-line.  I've shopped at http://www.fabric.com/ for many years and I have always been happy with them.  Their fabrics are cheaper than most other stores, because they are not the newest or latest from the manufacturers.  The order I received yesterday is a good example of how they operate; let me tell you about it.

On August 8th I placed an order; I wanted some white linen for dishtowels, and while I was there I threw a few more things into my shopping cart...to the tune of $116.78 (that is not unusual for me).  One of the best things to know about fabric.com is that THERE IS ALWAYS A COUPON, you just have to find it!!  I usually just google "coupon for fabric.com" (or whatever store I'm shopping at).  Usually their coupons are for 10%-15%, but this time I hit the jackpot with a 20% off coupon!  So I saved $23.40, bringing my total down to $93.38--I LOVE THAT!

Yesterday, August 15th, my order arrived.  I eagerly dug through the fabric...and I came up with something odd, a cream-colored batik, that I hadn't ordered.  I checked the invoice, and the sticker on the fabric, and sure enough, someone had made a mistake.
The batik is on the top; it should have been an alternate colorway of the purple polkadots on the bottom.  So I called fabric.com.  I was on hold for a few minutes (I was given the option to go to voicemail, but I waited instead.)  I explained the mix-up to the lady on the phone; she took my order number and the name of the missing fabric; then she told me she would have the correct fabric in the mail to me right away, and that I could keep the batik (or donate it if I couldn't use it)!    Five minutes later, when I checked my e-mail, there was a message from them saying the fabric would soon be shipped.  That's really great service.

One of the things I added to my shopping cart on a whim was the "Three Pound Cotton Remnant Assortment".  I couldn't resist the mystery of it!  I have to say it was a little disappointing, because I didn't like most of the fabrics, but I will find a use for them (I recently found the tutorial for fabric coil bowls, and I'm dying to make some! These fabrics would be good for that, because you will see the colors but not the prints.)  Here are the fabrics I liked in the assortment:


And here are the ones that didn't really grab me:
Oh well, it was $19.98 (minus 20%) for about 7 yards of fabric.

One more thing I like about fabric.com:  you accrue points for shopping there, and when your points reach a certain level, you can redeem them for a dollars-off coupon.  If you let them add up for a while, like I do, you will eventually have enough for a $50 dollar coupon!  I've done that twice in my 10 years of shopping there.  Awesome!!

Sunday, August 14, 2011

It's a Mystery

What is this??  Hmmm...I guess you will have to wait a few weeks to find out...

Friday, August 12, 2011

Hungry, Hungry Monster


Whoever said "Cute doesn't need a reason" sure knew what she was talking about!  Case in point:  these CUTE little monsters!  The pattern is by Ellen Luckett Baker and it's FREE over at The Long Thread (http://thelongthread.com/?s=monster+tooth+pillow).

Ellen calls it a Monster Tooth Pillow, and it was created for children waiting for the Tooth Fairy.  But couldn't people who aren't losing teeth (I hope!) have a few of these monsters too?  Of course we could!  Because cute doesn't need a reason!  So my friend Susan (www.thesloppysewer.blogspot.com)  and I are going to host a swap of these monster pillows on Craftster.  We are going to call them simply "Hungry Monsters" because they have a mouth that is a pocket. 

Wouldn't one of these be a great gift for your friends (both young and old) at Halloween, with some candy in the mouth?  And a group of them would look awesome any time of year, just sitting around on your sofa!  And who says they have to be only 6" tall?  Not me!  They could be any size, any fabric...and don't get me started on embellishments...!!   Just thinking of what the crafty swappers on Craftster will do with this pattern makes my mind race.  I can't wait to see them all!  Why don't you join us at www.craftster.com ?  The fun will start later this month.